English Knol Project
|
This article written by Will Johnson, wjhonson@aol.com
| Sansui SF-2 Speakers Source: http://www.canuckaudiomart.com |
at a flea market. They are quite unusual looking. They have wood cabinets, with an open lattice or honeycomb grill on all four sides and a flat top. Very "nice wood furniture" look. Even if they don't work! But the ones I got do work. This article at Billboard magazine calls them surround-sound, omni-radial.
The cabinets have four screws on the bottom, which is where the connector and switch is as well. Once you take the screws out, the entire upper apparatus lifts off, and it turns out each grill section than slides out separately. That's a relief after having to deal with the original KLH's which come completely sealed! Here's a picture, from an old advertisement, of what the SF-2's look like. Remember that honeycomb wood look is on all four sides. Very unusual design. Like one guy said, when he saw these for a cheap price, even if they don't work you can use them as cool end tables! In fact, Sansui spokesmen at the time said, "The attractive furniture styling makes them suitable for use as end tables or free-standing ornamentation."
 |
| Source: http://www.classicsansui.net/ |
You have to turn it on its head basically to take out the screws, but after you do that, lift off the bottom (now the top) very slowly because there are wires connected directly to it. Of course the nasty thing about this sort of foam disintegration is that it gets foam dust all over the inside! So a nice vacuuming and dusting later and they look super.
 |
| Source: http://www.classicsansui.net/ |
Blow up the connector and switch picture on the left here and you can see that these had an unusual component setup. Two 8" woofers and a single 2 1/2" tweeter.
The lower woofer points downward, and the upper woofer points upwards. I suppose this gives a "room-filling" sound. Not sure that idea really works though, but it's interesting. The tweeter sits directly above the upper woofer and then above those two is an odd inverted metal cone. It's very shiny, I have no idea what this thing might be called, but I assume that it reflects the sound from the woofer and tweeter out into the room. Very unusual, I've never seen anything like this before.
One modern commentator stated that these speakers were $200 when sold new. There are some modern ads that price them at about that price for the pair. However this ad from Billboard dated 1973, shows the SF-1's at $140 each (not per pair) and the SF-2s pictured in my article here, were the big brothers. So perhaps they were $200 each!
My partner has now removed all the old foam and foam dust. What a mess! Wear a mask, this stuff probably causes black lung disease. Added a tiny bit of stain to a couple dings. He's hesitant to sand these, as it looks like the surface might be a very thin veneer over probably something awful. Just for comparison, I'm going to look at trying to find speaker grill foam. There is one company here which sells the thin foam in three different sizes: 26"x23", 24"x19" and 31"x17". I measured one of the grills and it measures 22"x 10 1/2" so it looks like I would have to go with the 26"x23" foam and then cut them in half. I'm just not sure I want to pay $45 for a few pieces of foam!
Found a better price here at "The Foam Factory". I can redo both speakers for only $36, including shipping. I'd have to cut the full 72"x48" sheet down into eight pieces, but it's at least possible. They are calling this foam here "transparent, open-cell", and here they call it reticulated, open-pore. I'm assuming these are the same thing. Interestingly they state that these can be used as air filters. I wonder if shopping simply for an open-pore air filter sheet might find it at a better price? I just got a reply back from an email I had sent to The Foam Factory confirming that the 1/4" foam is acoustically transparent, which means it can be used for this application.
Okay! I, clever fellow that I am, said to myself, "Self..." (when you're talking to yourself, you always have to start with the word "Self"). "Self", I said, "wouldn't they use a kind of thin foam in... upholstery?". And sure enough, a trip to a local upholstery shop later, I have a huge sheet of thin foamy material (almost like a wool) that is acoustically transparent, charcoal colored, enough to do all eight grills, and only cost me... drum roll please... thirty bucks, no tax, and no shipping! Give that fellow a cookie!
Okay you're ready to do your grill foam/cloth but you're not a seamstress. Lay the grill directly on the foam and cut around it. Or just draw around it (on the foam side that's going to be the hidden side) with a pen or pencil and then cut that frame. Always cut a bit larger than you need, that gives you a margin of safety. We'll trim it out next, so don't worry about trying to be too exact yet. For this next step you might want some clips like the kind you use to keep a potato chip bag closed for a few days, after you've opened it. Called "chip clips" or "bag clips" or whatever. They are usually hard plastic and will not harm your grills, while the stronger clamps used in cabinetry and such, might leave marks on your grills.
Now that you have your rough-cut piece of foam, pick up the grill and foam and lay the grill on your lap. Put the foam directly on the grill. Take a pair of very sharp scissors. Holding the foam onto the grill tightly with one hand (or your clips), trim the edges right against the side of the grill, all the way around. Congratulations, without a tape measure, or a seamstress, you have made an perfectly-sized foam cover.
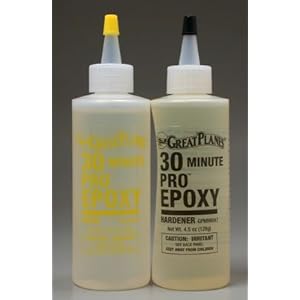 |
| 30-minute Pro Epoxy made by Great Plains |
Now you're ready to glue. Personally I like the two-part epoxy you can find in a hobby store. I use the 30-minute Pro Epoxy made by Great Plains. You can use all kinds of glue I suppose, but why skimp at this point ? The Pro Epoxy is about fifteen bucks, but you'll only need a small part of it to do this grill foam job. The stuff you leave in the bottles, will dry out after about two years, but I use it for all sorts of home jobs not just fixing speaker cabinets! It does however have to be clamped, because it's not an instant glue, but if you do the jobs in small bits, you could just use a heavy book. I like to use the chip clips. You will want to mix the glue in any old unused plastic lid, like off a mayonnaise jar or whatever. Just make sure the lid is one you don't want, and that it's plastic! Dig it out of your trash. Put one glob (that's a technical term) of each of the two parts of the glue onto the lid and then stir the globs together with a toothpick. You then use the toothpick to apply the globby mess to the edges of your grills (not the foam) and then clamp the foam down onto the glue, and let it sit clamped for at least fifteen minutes.
I'm now on the last of the eight grills, and it looks great. Oh and sounds great too!